Subtotal $0.00

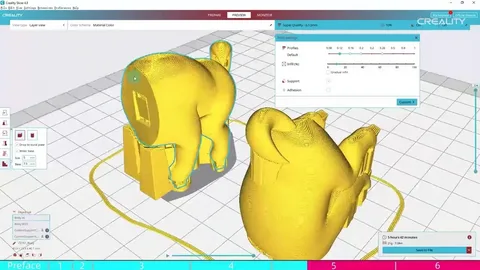
3D printing success depends heavily on software settings, and one of the most important tools in the workflow is the creality slicer. Whether you are a beginner or an experienced maker, fine-tuning your slicer settings can dramatically improve print quality, reduce errors, and save material.
In this guide, you’ll discover practical tips and tricks to optimize your creality slicer settings for smoother surfaces, stronger prints, and more reliable results. Each section focuses on key adjustments that directly impact your final print outcome.
Optimizing Layer Height for Smoother Prints
Layer height is one of the most critical settings in the creality slicer, as it determines how detailed and smooth your finished print will be. A smaller layer height (like 0.12mm) produces finer detail, while a larger one (like 0.28mm) prints faster but with more visible layers.
Choosing the right balance depends on your project. For decorative models, lower layer heights are ideal, while functional parts can tolerate thicker layers for speed and strength.
Another important tip is to keep layer height consistent across similar prints. Switching randomly between settings can affect adhesion and surface quality. By standardizing your approach in the creality slicer, you maintain predictable and high-quality results.
Mastering Print Speed and Acceleration Settings
Print speed has a direct impact on quality, and the creality slicer allows you to fine-tune it for different parts of your model. Faster speeds reduce print time but can lead to vibrations, ringing, and poor layer adhesion.
For better quality, slow down outer walls while keeping infill faster. This ensures visible surfaces remain smooth while internal structures still print efficiently.
Acceleration and jerk settings are often overlooked but equally important. Reducing these values in the creality slicer can significantly improve corner sharpness and reduce ghosting effects on the print surface.
Improving Adhesion with Bed and First Layer Settings
A strong first layer is essential for any successful 3D print. In the creality slicer, the first layer settings control how well your print sticks to the build plate.
Increasing first layer height slightly and slowing down its speed helps improve adhesion. A thicker first layer allows the filament to bond more securely to the bed surface.
You should also adjust bed temperature and initial layer flow. The creality slicer lets you slightly increase extrusion for the first layer, which can help eliminate gaps and ensure a solid foundation for the rest of the print.
Fine-Tuning Infill and Wall Settings for Strength
Infill density and wall thickness determine how strong and durable your prints will be. The creality slicer offers multiple infill patterns such as grid, gyroid, and cubic, each serving different purposes.
For functional parts, increasing wall line count is often more effective than just raising infill percentage. Strong outer walls provide structural integrity where it matters most.
Using adaptive infill in the creality slicer can also optimize print time and material usage. This feature increases strength only in high-stress areas, making your prints both efficient and durable.
Enhancing Support Structures for Cleaner Models
Support structures are necessary for overhanging parts, but poorly configured supports can damage surface quality. The creality slicer allows you to customize support density, placement, and interface layers.
Reducing support density while increasing interface quality helps achieve easier removal and cleaner surfaces. A well-tuned support interface prevents scarring on your model.
You can also experiment with tree supports in the creality slicer, which reduce material usage and make support removal easier while maintaining stability for complex geometries.
Conclusion
Improving print quality is not just about hardware—it largely depends on how well you configure your software. The creality slicer provides powerful tools that allow you to control every aspect of your 3D printing process, from layer height to support structures.
By carefully adjusting settings like speed, adhesion, infill, and supports, you can dramatically enhance the final output of your prints. With practice and experimentation, the creality slicer becomes an essential tool for achieving professional-level 3D printing results every time.