Subtotal $0.00

If you’ve ever wondered why some embroidery looks flawless while others look messy and uneven, the answer lies in one thing—digitizing.
A high-quality embroidery machine alone cannot guarantee perfect results. Without proper digitizing, even the best designs can turn into distorted stitches, thread breaks, and poor output.
That’s why Custom Embroidery Digitizing Services USA are essential for businesses and professionals who want clean, accurate, and professional embroidery.
In this guide, you’ll learn the complete step-by-step process of embroidery digitizing, how experts convert artwork into stitch files, and what makes the difference between average and premium-quality embroidery.
What is Custom Embroidery Digitizing Services USA
Custom embroidery digitizing services USA involve converting artwork into a stitch file that embroidery machines can understand.
Unlike regular images, embroidery machines need instructions such as:
- Stitch type
- Stitch direction
- Stitch density
- Stitch order
Digitizing is not automatic—it is a manual and technical process that requires skill and experience.
For example:
- Satin stitches for text
- Fill stitches for large areas
- Running stitches for details
Each stitch type plays a specific role in the final embroidery result.
Why It Matters
Understanding the digitizing process helps you get better results.
Here’s why custom embroidery digitizing services USA matter:
1. Ensures Accurate Stitching
Proper planning leads to clean and precise embroidery.
2. Reduces Errors
Minimizes thread breaks and machine issues.
3. Improves Design Quality
Maintains logo clarity and proportions.
4. Saves Time
Efficient files speed up production.
5. Works on All Fabrics
Settings are adjusted for fabric type.
In the US market, quality embroidery can set your brand apart.
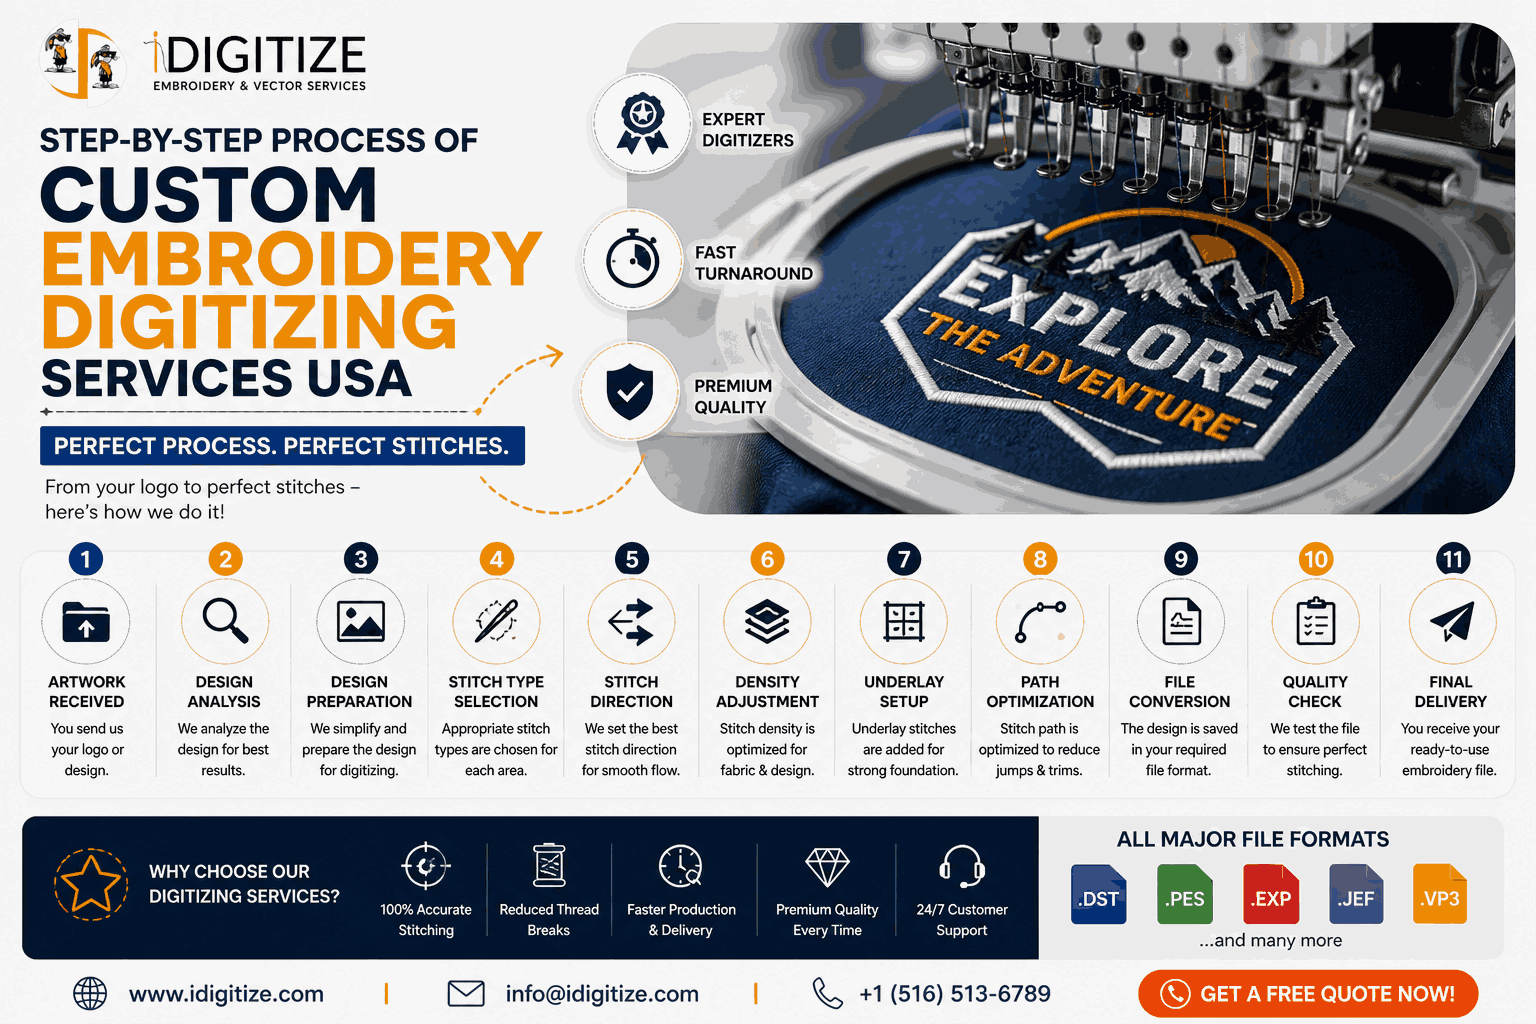
Step-by-Step Guide
Here is the full professional process:
Step 1: Artwork Submission
You provide your design in any format (JPG, PNG, PDF).
Step 2: Design Analysis
Digitizer evaluates size, complexity, and fabric type.
Step 3: Design Preparation
Complex elements are simplified if needed.
Step 4: Stitch Type Selection
Each element is assigned appropriate stitch types.
Step 5: Stitch Direction Planning
Direction is set for smooth and natural stitching.
Step 6: Density Adjustment
Thread density is optimized for fabric and design.
Step 7: Underlay Setup
Base stitches are added for stability.
Step 8: Path Optimization
Stitch sequence is planned to reduce trims and jumps.
Step 9: File Conversion
Design is converted into machine formats (DST, PES, EXP).
Step 10: Testing & Quality Check
The design is tested on fabric to ensure quality.
Step 11: Final Delivery
Ready-to-use stitch files are delivered.
This process ensures perfect embroidery output every time.
Expert Tips and Tricks
To get the best results:
- Always use high-resolution artwork
- Avoid overly detailed designs
- Choose proper stitch types
- Test designs before production
- Work with experienced digitizers
These tips help improve efficiency and quality.
Common Mistakes to Avoid
Avoid these errors:
- ❌ Using auto-digitizing tools
- ❌ Ignoring stitch direction
- ❌ Incorrect density settings
- ❌ Not testing files
- ❌ Choosing low-quality services
Fix:
Always choose custom embroidery digitizing services USA with manual quality control.
Real Examples and Case Studies
Case Study 1: Small Business
A startup improved embroidery quality after proper digitizing.
✔ Result: Clean and consistent branding
Case Study 2: Apparel Brand
A clothing brand reduced errors using optimized stitch files.
✔ Result: Faster production and fewer issues
These examples show how the process directly impacts results.
Conclusion
Embroidery digitizing is the foundation of quality embroidery. Custom Embroidery Digitizing Services USA ensure your designs are translated into precise, clean, and professional stitch files.
By understanding the step-by-step process, you can avoid common mistakes and achieve better results.
If you want consistent quality, reduced errors, and professional output, investing in proper digitizing is essential.
👉 Start using expert digitizing services today and upgrade your embroidery results.
FAQ SCHEMA (10 Questions)
1. What is the embroidery digitizing process?
It is the conversion of artwork into stitch files for embroidery machines.
2. How long does digitizing take?
Usually 6–24 hours depending on complexity.
3. What file formats are used?
DST, PES, EXP, and others.
4. Why is stitch direction important?
It affects texture and final appearance.
5. What is underlay stitching?
A base layer that stabilizes the design.
6. Can I digitize my own designs?
Yes, but it requires skill and software.
7. What causes embroidery errors?
Poor digitizing and incorrect settings.
8. Is manual digitizing better?
Yes, it ensures higher accuracy.
9. Can files be reused?
Yes, but fabric type may vary results.
10. Who needs digitizing services?
Businesses, designers, and embroidery shops.